Step 1:

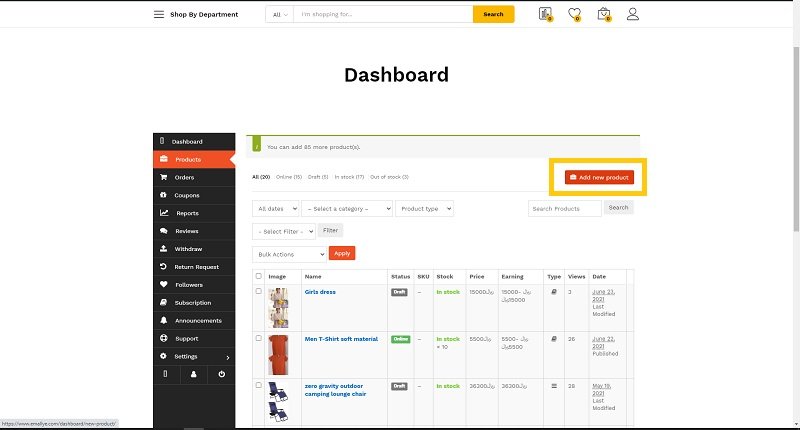
Navigate to your dashboard as shown on Tutorial 1. Then Click on Products on the left vertical menu. Then click the “Add Product ” button on the right.

Step 2:

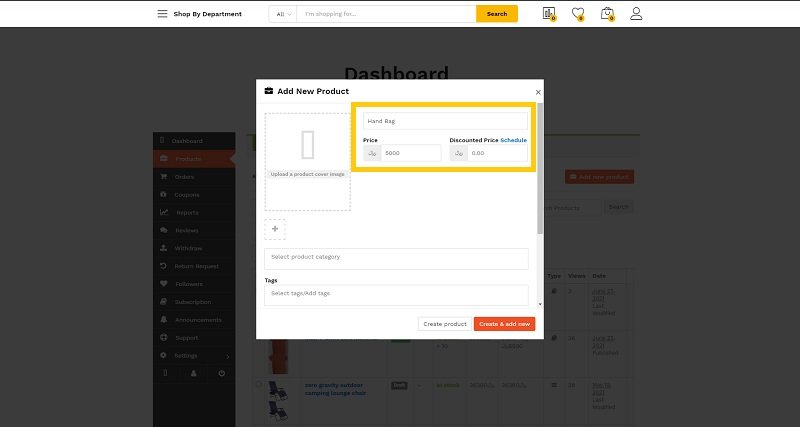
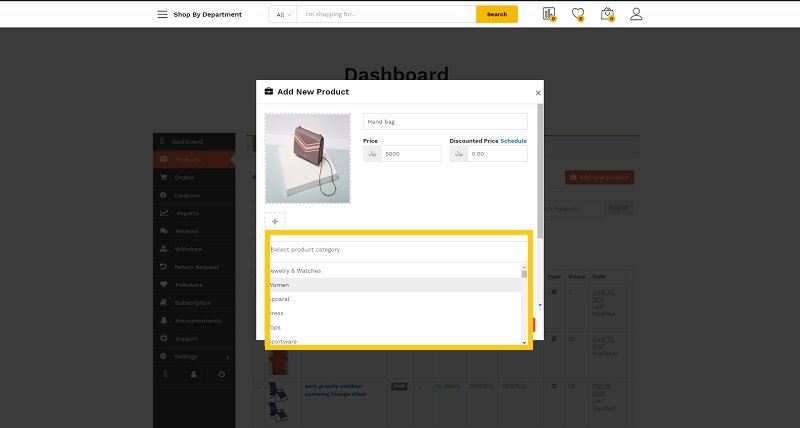
A pop up form will appear on your screen. Add the product name and price and discount if there is any.

Step 3:

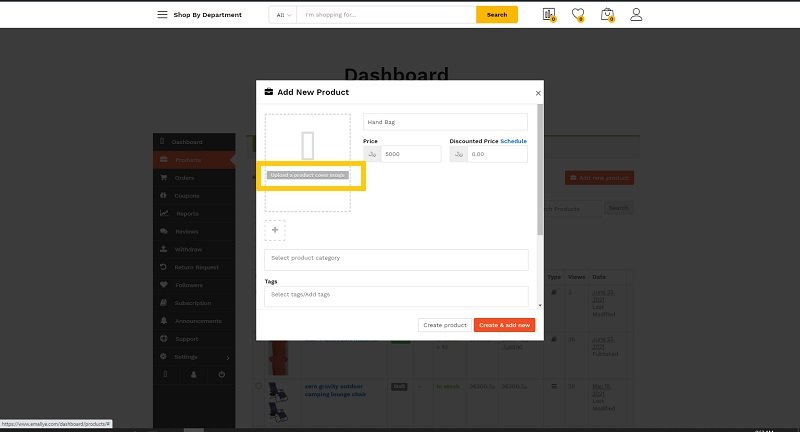
To upload your products main image click the upload button shown on the screenshot.

Step 4:

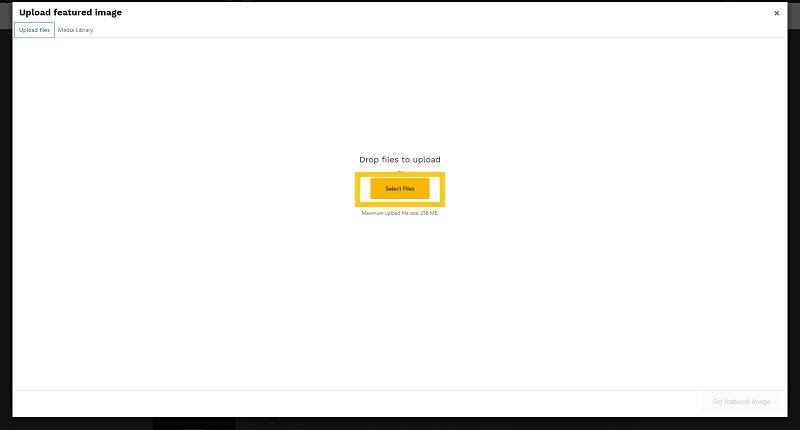
When you click the upload button it will lead you to another pop up. Choose “Upload” then click “Select File” in the middle of the screen and choose an image from your device.

Step 5:

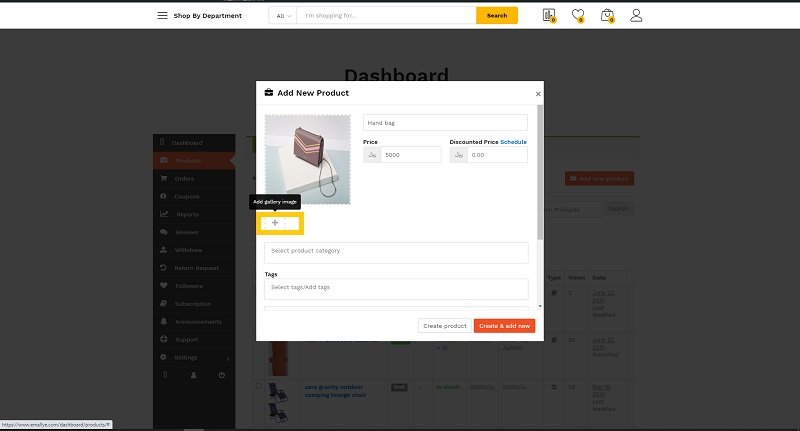
If you want to add more images of the product, click on the plus button under the image.

Step 6:

Select a category(s) for your product to make it easier for customers to find it.

Step 7:

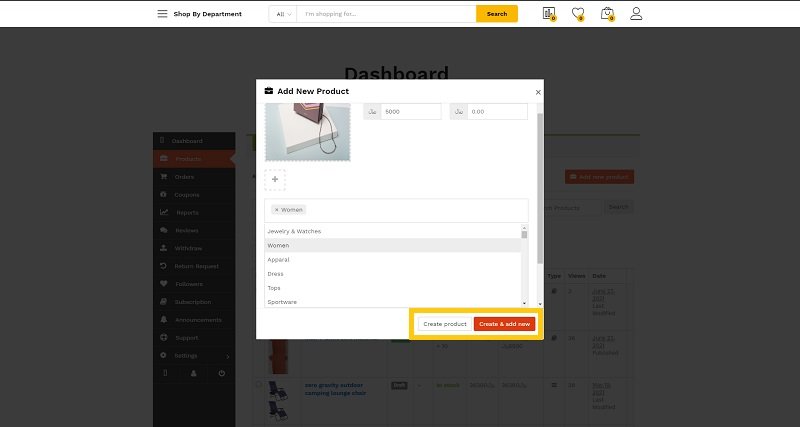
Once you are done registering your products click “Create Product”. If you want to add another product click on “Create and Add new” button.

Step 8:

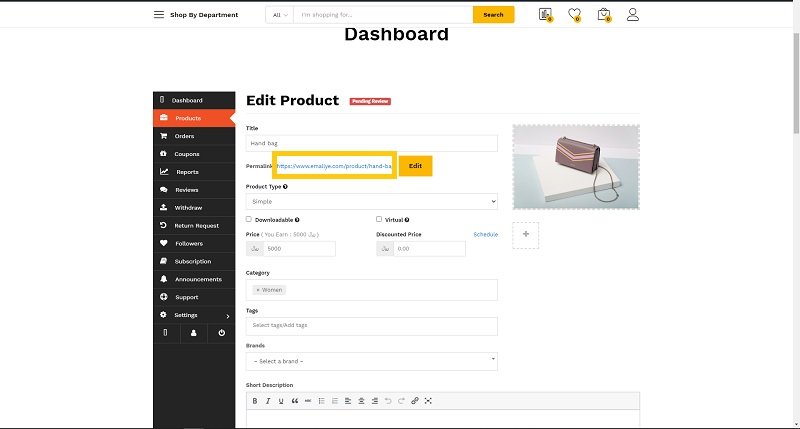
It will take you to Edit Product page on your dashboard. If you would like to edit any of the information you have inserted you can do it here. To see your product on the product page click the link as shown in the image.

If you are adding simple products you are done. But if you are adding variable product you may continue.

Tip

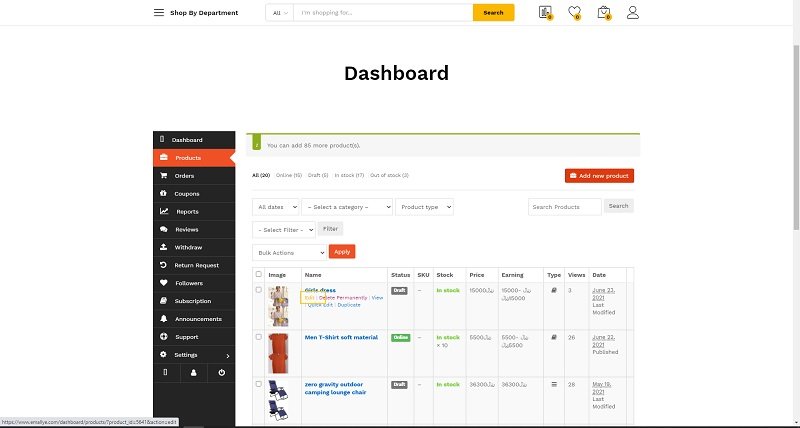
You may edit all your products by also navigating to the Products page on the dashboard and looking for a link that says “Edit” below the name of each product as shown in the image.

Step 9:

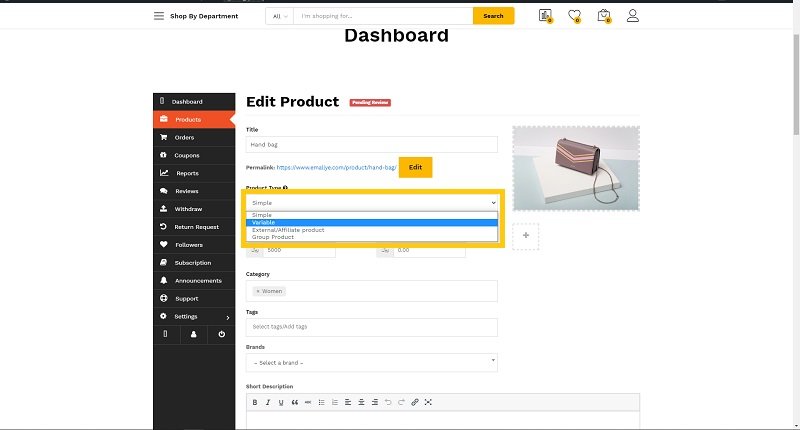
If your product is variable (example with several colors and sizes), click the drop down menu below “Product Type” and choose “Variable”.

Main Menu